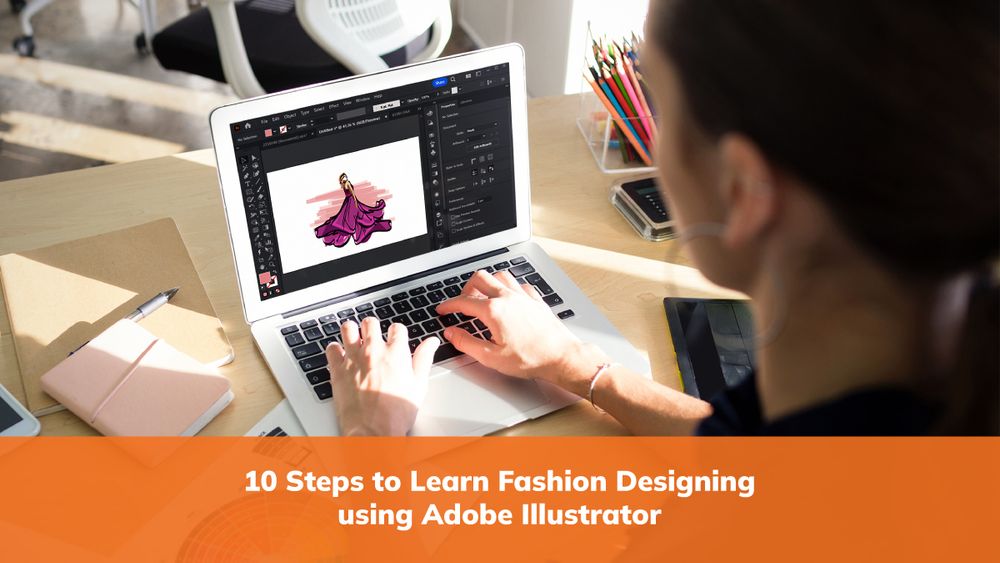
10 Steps to Learn Fashion Designing using Adobe Illustrator
Adobe Illustrator has become an indispensable tool for fashion designers, offering a versatile platform for creating stunning and professional designs. The adobe illustrator tutorial helps to understand the process much more easily. Whether you're a beginner or an experienced designer looking to enhance your digital design skills, this step-by-step guide will walk you through the process of fashion designing using Adobe Illustrator.
Step 1: Setting Up Your Workspace
Setting up your workspace in Adobe Illustrator is crucial for optimizing your workflow and making the fashion designing process smoother. Here are some key steps to follow:
- Launch Adobe Illustrator: Open the Adobe Illustrator application on your computer. If you don't have it installed, download it from the official Adobe website and follow the installation instructions.
- Create a New Document: Upon launching Illustrator, create a new document by selecting "File" in the menu bar and selecting "New" or using the keyboard shortcut Ctrl/Cmd + N. In the New Document dialogue box, specify the dimensions and resolution for your fashion design. Consider the intended use of your design, whether it's for print or digital platforms, and adjust the settings accordingly.
- Customize Your Workspace: Adobe Illustrator tutorial provides a highly customizable workspace, allowing you to arrange tools and palettes to suit your preferences and optimize your workflow. Take some time to explore the different panels and tools available. You can access them from the "Window" menu in the menu bar. Some essential panels for fashion design include Layers, Swatches, Colors, and Brushes.
- Arrange Your Tools: Drag and dock your frequently used tools to the toolbar for quick access. The Selection tool (V), Pen tool (P), and Shape tools (Rectangle, Ellipse, etc.) are commonly used for fashion design and can be accessed from the toolbar. You can customize the toolbar by right-clicking on it and selecting "Customize Toolbar" to add or remove tools.
- Familiarize Yourself with Essential Tools: Take the time to learn and understand the functionality of essential tools in Adobe Illustrator. The Selection tool allows you to select and manipulate objects. The Pen tool is used to create and edit paths, which form the basis of your fashion design. Layers help you organize your artwork, allowing you to work on different elements separately. Understanding these tools will help you work efficiently and effectively.
- Adjust Preferences: Customize the preferences in Adobe Illustrator to align with your design requirements. Access the preferences by selecting "Edit" in the menu bar and selecting "Preferences." Here, you can adjust settings related to units of measurement, grids and guides, keyboard shortcuts, and more.
By following these steps, you can set up your workspace in Adobe Illustrator to suit your needs and preferences, making navigating the software and creating your fashion designs easier. Remember to save your workspace layout as a pre-set to easily switch back to it in the future or share it with other designers.
Setting up an organized and customized workspace lays a solid foundation for your fashion design journey on Adobe Illustrator, enabling you to focus on your creative process and easily bring your ideas to life.
Step 2: Sketching Your Design
Sketching your fashion design concept is an essential step in the creative process. It allows you to visualize and refine your ideas before translating them into digital form using Adobe Illustrator. Here's a detailed explanation of how to approach sketching your design:
Gather Inspiration: Begin by gathering inspiration for your design. Browse fashion magazines and online platforms, or create a mood board to collect images, colours, textures, and patterns that resonate with your design concept. This will help you establish a visual direction and create a cohesive design.
Start with a Rough Sketch: Grab a pencil and paper and start sketching your design concept. Begin with loose, rough sketches to explore different silhouettes, proportions, and details. Focus on capturing the overall shape and structure of the garment rather than getting caught up in intricate details at this stage.
Define the Pose& Refine the Sketch: Consider the pose of your fashion illustration. Experiment with different poses to convey your design's attitude, movement, and personality. Pay attention to the body proportions and balance, ensuring the pose complements the garment you're designing. Once you're satisfied with the rough sketch, refine it by adding more details.
Define the neckline, sleeves, waistline, hemline, and any other key design elements. Use light, confident strokes to create clean lines and contours. Once you have a refined sketch, scan it or take a high-quality photograph using a smartphone or camera. This step lets you bring your sketch into the digital realm and work on it in Adobe Illustrator.
Step 3: Import the Sketch into Illustrator
Adobe Illustrator tutorials for beginners show you how to create a new document or open an existing one. Use the File menu to import your scanned sketch or drag and drop the photo directly into the workspace. Scale and position the sketch according to your preferences.
- Lower the Sketch Opacity: To work on top of the sketch, reduce its opacity. Select the sketch layer and adjust the opacity in the Transparency panel. This allows you to see your sketch as a guide while drawing clean, digital lines on top of it.
- Create a New Layer: Create a new layer above the sketch layer. This will be where you draw the digital version of your fashion design, ensuring it remains separate from the sketch layer for easier editing and modification.
- Trace and Refine: Use the Pen tool or other drawing tools in Adobe Illustrator to trace the outlines of your design. Start by creating basic shapes like the torso, sleeves, and collar. Pay attention to the proportions and accuracy of the elements, refining and adjusting them as needed.
- Add Details and Texture: Once you have the basic outline of your design, begin adding details such as pleats, ruffles, buttons, or pockets. Use a combination of drawing tools and techniques to create textures and patterns that enhance the overall look of your design.
- Experiment with Colors: You can also experiment with different colour schemes and combinations while sketching. Create colour swatches using the Swatches panel and apply them to your design elements using the Fill and Stroke options. This step allows you to visualize the colour palette before finalizing your design.
Sketching your fashion design concept on paper and then translating it into Adobe Illustrator helps you maintain the essence of your original idea while leveraging the digital capabilities of the software. It also provides a valuable reference for future design iterations or collaborations.
Step 4: Creating Basic Shapes
After sketching your fashion design concept and importing it into Adobe Illustrator, the next step is to create basic shapes that form the foundation of your design. These shapes will serve as a guide for the overall structure and proportions of your garment. Here's a detailed explanation of how to create basic shapes in Adobe Illustrator:
- Select the Pen Tool: The Pen tool (shortcut key: P) is versatile for creating and editing paths in Adobe Illustrator. It allows you to draw precise and smooth lines that form the basis of your fashion design.
- Choose the Anchor Point: Start by selecting the anchor point where you want to begin drawing your Shape. An anchor point on the canvas serves as a starting or ending point for your path.
- Create Straight Lines: To create a straight line segment, click once on the canvas to place an anchor point, then click again at the desired endpoint. Repeat this process to create additional straight-line segments as needed for your design.
- Create Curved Lines: If your design requires curved lines, click and drag the mouse after placing the anchor point to create a curved line segment. The direction and length of the drag determine the curvature of the line. You can adjust the curve later by manipulating the handles of the anchor points.
- Close the Shape: To close a shape, click on the starting anchor point or the endpoint of the last line segment. This will complete the Shape and create a closed path.
- Adjust Anchor Points and Curves: After creating the basic Shape, you can refine it by adjusting the anchor points and curves. Select the Direct Selection tool (shortcut key: A) and click on an anchor point to manipulate it. Drag the anchor points or their handles to modify the Shape, ensuring that it matches your design concept.
- Create Additional Shapes: Repeat the process to create additional basic shapes for different elements of your garment, such as sleeves, collars, waistbands, or pockets. Use a combination of straight and curved lines to depict each element's structure and form accurately.
- Utilize the Shape Tools: In addition to the Pen tool, you can also use the Shape tools (Rectangle, Ellipse, Polygon, etc.) to create basic shapes. These tools allow you to draw predefined shapes quickly and easily. Access the Shape tools from the toolbar on the left side of the workspace.
- Combine and Subtract Shapes: Adobe Illustrator offers powerful tools, such as the Pathfinder panel, that allow you to combine or subtract shapes to create more complex forms. Experiment with these tools to create interesting shapes and silhouettes.
- Use Guides and Grids: To ensure accuracy and consistency in your designs, consider utilizing guides and grids. Guides help you align elements and maintain proportional relationships, while grids provide a framework for precise positioning and spacing. Access guides and grids from the View menu.
By creating basic shapes in Adobe Illustrator, you establish the structural framework of your fashion design. These shapes guide adding details, refining proportions, and building upon your initial sketch. Remember to save your progress regularly and utilize the available tools and features to achieve the desired outcome.
Step 5: Adding Details and Textures
To add intricate details, use a combination of drawing tools such as the Pen, Pencil, and Shape tools. Experiment with stroke and fill options to create textures, patterns, or embellishments that enhance your design. Utilize the Pathfinder tool to combine and manipulate shapes seamlessly.
Step 6: Working with Colors and Gradients
Choose an appropriate colour scheme for your design and apply it using the Fill and Stroke options. Experiment with different colour combinations and gradients to achieve the desired visual impact. Adobe Illustrator offers a variety of tools to create and edit gradients, allowing you to add depth and dimension to your design.
Step 7: Incorporating Text and Typography
Typography plays a vital role in fashion design, especially when branding or showcasing your design label. Use the Type tool to add text and experiment with different fonts, sizes, and styles to create visually appealing labels, logos, or captions.
Step 8: Applying Shadows and Highlights
To add depth and dimension to your design, incorporate shadows and highlights. Utilize the Blend tool to create smooth gradients that emulate realistic lighting effects. Experiment with opacity settings to achieve the desired level of subtlety or intensity.
Step 9: Organizing Layers and Artboards
As your design becomes more complex, organizing your artwork efficiently is crucial. Utilize the Layers panel to group and label different elements, making navigating and modifying your design easier. Consider using multiple artboards to work on different design variations or additional details.
Step 10: Exporting and Presentation
Once you're satisfied with your fashion design, it's time to prepare it for presentation or production. Use the Export function in Adobe Illustrator to save your design in various formats such as JPEG or PNG. Create a separate document with detailed technical specifications, including measurements, fabric details, and sewing instructions if needed.
Adobe Illustrator provides an excellent platform for fashion designers to bring their creative visions to life. By following this step-by-step guide, you can leverage the powerful tools and features of Adobe Illustrator to design stunning and professional fashion illustrations. Enrol in the adobe illustrator fashion design online course for the best learning experience. Remember to practice, experiment, and explore techniques to develop your unique style and create remarkable fashion designs. With dedication and creativity, you can achieve remarkable results in fashion design using Adobe Illustrator.